Introduction
This is the standalone write-up of my third Kivy Crash Course video, linked above. In this entry, I head back to Python to add some more complex and interesting behaviour to our simple program from the first article.
If you want to follow along, you can copy down the state of the code from the end of the first tutorial, as below. You can also find it on github.
from kivy.app import App

from kivy.uix.scatter import Scatter
from kivy.uix.label import Label
from kivy.uix.floatlayout import FloatLayout

class TutorialApp(App):
    def build(self):
        f = FloatLayout()
        s = Scatter()
        l = Label(text="Hello!",
                  font_size=150)

        f.add_widget(s)
        s.add_widget(l)
        return f

if __name__ == "__main__":
    TutorialApp().run()
As explained in my original article, this codes for a simple app with a label saying ‘Hello!’ that you can click and drag around. You can also scale and rotate it by using multiple touches if you have a multitouch interface, or on a desktop/laptop by right clicking to use Kivy’s touch emulation.
Adding some more behaviour
So how are we going to change the app? I want to add some more complex behaviour - at the moment, it’s nice that we can move the text around, but this is all handled by the Scatter widget and it isn’t yet clear how we could create our own widget interactions in a useful way.
I’m going to demonstrate a simple widget interaction by adding a
TextInput, a textbox widget that the user can type into. I’ll then
create a binding so that the Label automatically updates to match this
text, so as soon as the user types anything the text is automatically
propagated to the Label, which we’ll still be able to drag around via
the Scatter widget.
Let’s start by importing the widgets we need:
from kivy.uix.textinput import TextInput
from kivy.uix.boxlayout import BoxLayout
The BoxLayout is a kind of layout that automatically places its children in a row, either horizontally (the default) or vertically. We’re going to use this as our new top level root widget containing our entire application. That’s because we don’t want to change any of the existing app structure (the Label in a Scatter in a FloatLayout), but instead to place our new TextInput next to it. That’s what the BoxLayout will do, plus it can also handle more advanced stuff like proportional sizes, which I’ll cover later in this article.
Now we have a plan, so lets create our new widgets. We can add the
following at the top of our build() method:
b = BoxLayout()  # The default BoxLayout, no
                 # extra properties set
t = TextInput(font_size=150)
The TextInput font_size could also be left as the default, setting it to 150 pixels is just an example customisation. Both the BoxLayout and TextInput have many other properties you could set, which you can find in the linked Kivy documentation if interested.
Having created our new widgets, we need to add them to the widget tree
of the existing build method. We now want to return the BoxLayout
(it’s going to be our top level widget), and we’ll need to add both
the FloatLayout and the TextInput to that one, so that the BoxLayout
contains them both and can place them next to one another. That means
the full build method can become:
def build(self):
    b = BoxLayout()
    t = TextInput(font_size=150)
    f = FloatLayout()
    s = Scatter()
    l = Label(text="Hello!",
              font_size=150)

    f.add_widget(s)
    s.add_widget(l)

    b.add_widget(f)
    b.add_widget(t)
    return b
Before going any further, lets see exactly what this looks like!
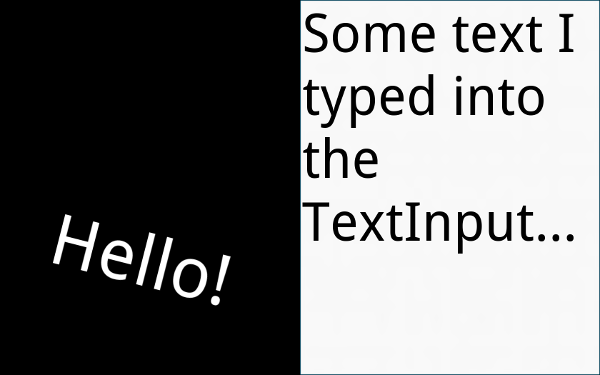
The above image is exactly the code from above, plus I moved the Scatter a little and typed into the TextInput. Everything seems to work as expected. Note that the BoxLayout aligns its child widgets horizontally, so the first one added (the FloatLayout) is on the left, whilst the second (the TextInput) is on the right.
Now we can focus on making changes to achieve the original goal - I want the TextInput to be at the top of the screen, and it doesn’t need to take up half of it (the default setting), but only to have a fixed height large enough to fit in a line of text. I also want the TextInput text to propagate straight to the Label, updating the movable text.
The first step here is reorienting the BoxLayout - by default it has placed its two children horizontally adjacent, but we can make it vertical instead by changing a single line:
b = BoxLayout(orientation='vertical')
Let’s also set the height of the TextInput to a specific value. The
first thing to do is a minor Kivy subtlety, we have to set its
size_hint_y to None. All widgets have a default size_hint of 1 in
both the x and y directions, and it’s this number that the BoxLayout
is using to resize its child widgets proportionally - since both have
1, they both have the same height or width. Whenever we want
to set a manual size, we must first set the appropriate size_hint to
None, after which we can manually set the height or width and have the
widget maintain that specific value.
If that isn’t clear to you, I suggest playing with changing the size_hint and seeing how it changes the relative widget sizes. After that, you can replace the TextInput declaration with the following. I’ve also given it some default text so that it doesn’t start off empty.
t = TextInput(text='default',
              font_size=150,
              size_hint_y=None,
              height=200)
The height is set in the default unit of pixels, so it’s just a little larger than the font_size and will easily fit in a line of text.
The final layout change is to add the TextInput before the
FloatLayout. The BoxLayout places its children in order from left to
right (if horizontal) or from top to bottom (if vertical), so we need
to add the TextInput first for it to be at the top of the screen. You
can simply switch the order of the add_widget calls as follows:
b.add_widget(t)
b.add_widget(f)
With our layout all set up, we can move to creating the binding that will cause the Label to automatically update when text is changed in the TextInput. The syntax is as follows:
t.bind(text=some_function)
This would mean that when the text of the widget t changes,
some_function is automatically called. That some_function could be
absolutely any function, it could change your gui, or print to the
console, or communicate on a network, or anything else that you can
program in Python. This is a very useful and general way to make
things happen in response to changes (e.g. from user interaction) in
your widgets.
We’ll need to use a very specific function, we need one that takes the modified text (which is automatically passed as an argument) and uses it to set the text of our label to the same thing. Of course we could write our own function to do this and use that function in the binding, but actually Kivy has a convenient alternative method:
t.bind(text=l.setter('text'))
Remember, l is our Label. The setter method is available for any
Kivy widget (and some other Kivy objects), and it always returns a
function that sets the given property. That’s exactly what we want,
so overall the effect is that when the text of the Textinput
changes, it calls the returned function, which updates the text of the
Label. Therefore the Label text will always change immediately to
match the TextInput, and we’ll get the behaviour I originally wanted.
This could be a little confusing, but again I encourage you to experiment to see what happens. A good exercise would be to replace the setter call with your own function that (for instance) prints its arguments to the terminal. That way you can see exactly when the function is called (as you type in the TextInput), and exactly what arguments it receives.
After that…we’re done! We’ve changed the arrangement of our widgets, and our new binding should update the Label as we type in the TextInput. The full program should look something like the following:
from kivy.app import App

from kivy.uix.scatter import Scatter
from kivy.uix.label import Label
from kivy.uix.floatlayout import FloatLayout
from kivy.uix.textinput import TextInput
from kivy.uix.boxlayout import BoxLayout

class TutorialApp(App):
    def build(self):
        b = BoxLayout(orientation='vertical')
        t = TextInput(font_size=150,
                      size_hint_y=None,
                      height=200)
        f = FloatLayout()
        s = Scatter()
        l = Label(text="Hello!",
                  font_size=150)

        f.add_widget(s)
        s.add_widget(l)

        b.add_widget(t)
        b.add_widget(f)
        t.bind(text=l.setter('text'))
        return b

if __name__ == "__main__":
    TutorialApp().run()
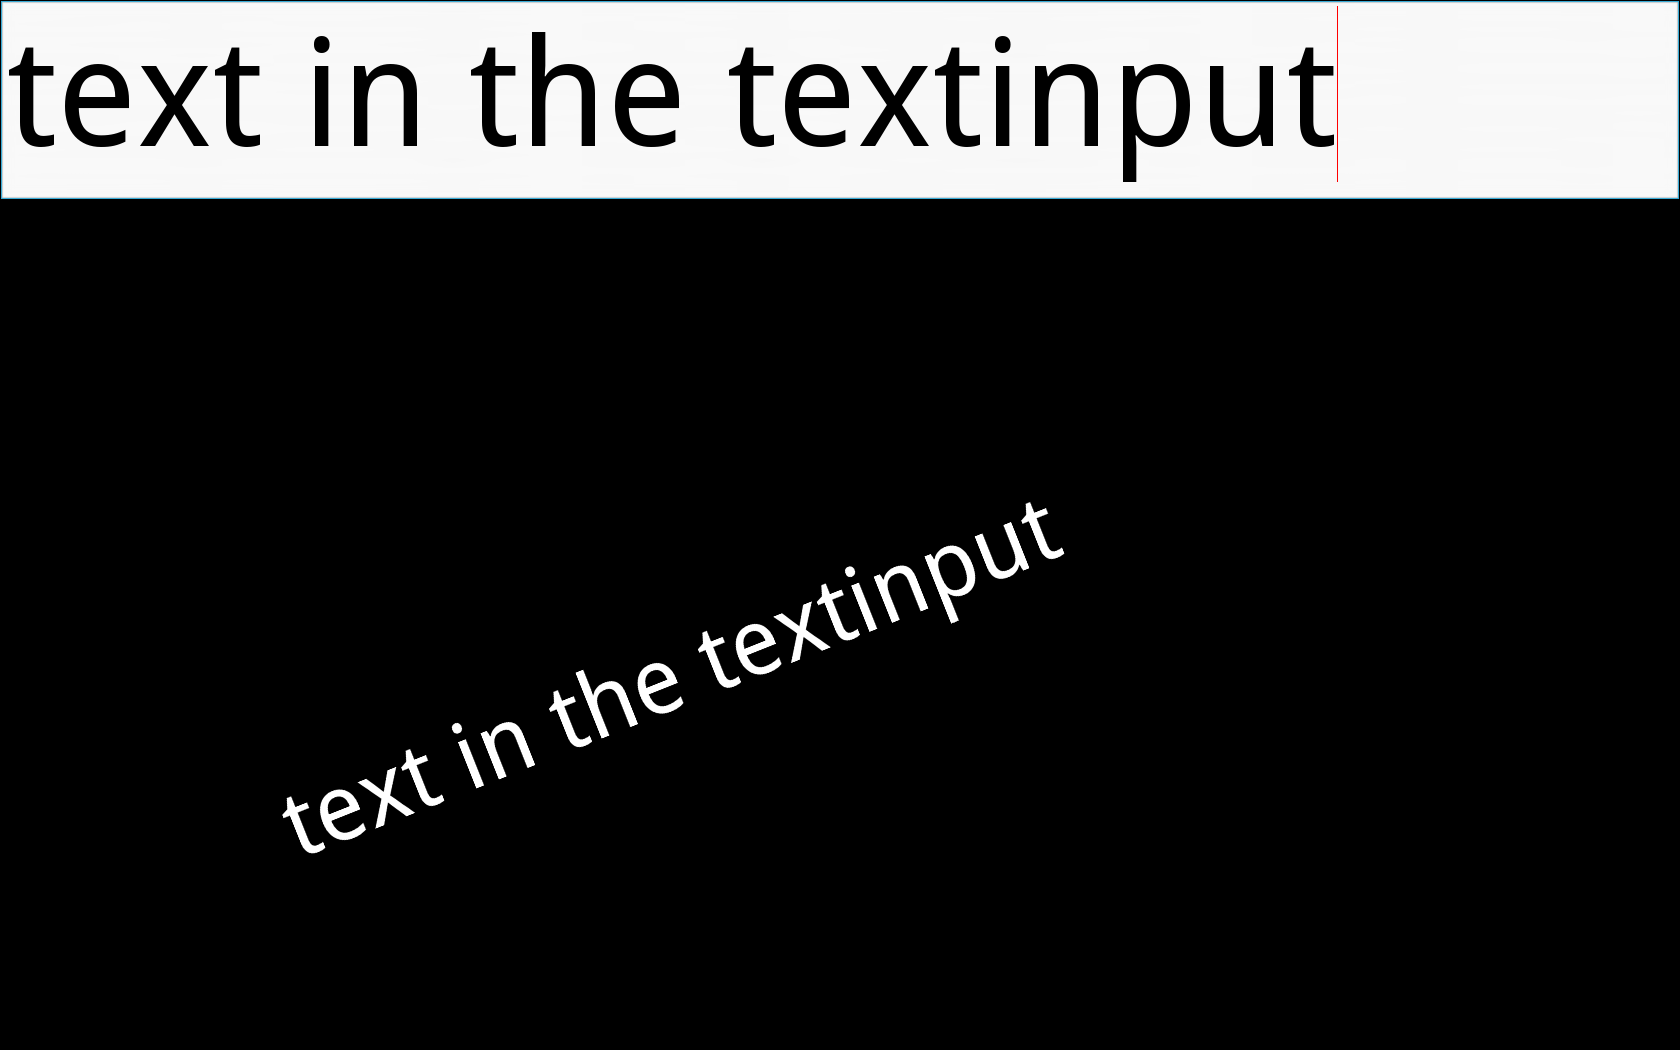
When you run the code and type in the TextInput, you should get something like this, with the Label updating to match the TextInput as expected:
This post has been a very quick introduction to some basic Kivy layout techniques, and a simple way to bind our own behaviours when widget properties change. In the next post, I’ll talk about Kivy’s own domain specific language for creating widget trees, which includes a different but extremely powerful and convenient method for doing many of these tasks.
You can download the finished code from the end of the article here.