Introduction
This is the first entry in my Kivy Crash Course, originally a series of short (~10 minutes or less) youtube videos introducing how to create an app using the kivy graphical framework, how to use different Kivy features, and other topics like how to build for android. In this series I’ve set out to write up each video as a short written tutorial. These tutorials will be standalone, you don’t need to refer to the original video, but they will cover roughly the same topics. I may also supplement with posts about other Kivy features.
The idea of these tutorials is that you can just dive in - you’ll need Kivy installed if you want to follow along, but I’m starting totally from scratch and quickly progressing through all the basic kivy features. I’ll explain what’s going on along the way, there are also plenty of opportunities for experimentation at each stage.
For anyone that doesn’t know, Kivy is a graphical framework for Python. You can use it to make graphical interfaces for your applications, and it comes with a nice set of highly extensible widgets covering standard functionality and which can easily be combined to make powerful and complex interfaces. One of the the great advantages of Kivy (and one of my favourite features!) is that it’s very highly cross platform - a kivy app will run not just on standard desktop platforms like Linux, Windows and OS X, but can also easily be compiled into an android or iOS app, or run on more unusual devices like the raspberry pi. I won’t introduce more details of kivy here, but you can check out its website for more details.
A first Kivy app
So…lets actually do something! We’ll start completely from scratch,
and our kivy entry point will be an App class which we’ll import
from kivy.
from kivy.app import App
The App is the base of any Kivy application, and we’ll start making
our own Kivy program by defining our own App subclass.
class TutorialApp(App):
    pass
At this point we don’t even need to add any behaviour, the App can
already run, and if we do so it will perform all the basic application
setup like creating a window, sizing and positioning it, and
potentially even stuff like retreiving application settings and
constructing a settings panel.
To complete our first totally trivial kivy app, we just add a standard
python declaration that instantiates our TutorialApp
class and calls its run method - the function that tells the App
to start and to do its thing. With this addition, the full file should
look like the following:
from kivy.app import App

class TutorialApp(App):
    pass

if __name__ == "__main__":
    TutorialApp().run()
You can already run this app if you like - it should start up fine, and you’ll get a totally black window because we didn’t tell it to display anything. Congratulations on your first kivy program!
To make this more interesting, we need to tell our App how to
display something. In practice with Kivy, this means telling it to
display some Widget. Kivy comes with quite a lot of widget
classes, generally small with some specific functionality of their own
(checkbox, label, textinput, scrollable container etc.), but
designed to be easy to combine to make much more complex interfaces
with whatever behaviour you really want.
For now we’ll import a simple Button widget:
from kivy.uix.button import Button
Next we need to tell Kivy how to display this button. We do this using
the build method of App. When the App is run it calls this build
method, and whatever is returned is used as Kivy’s ‘root widget’. This
widget is automatically sized and positioned to fill the window, and
the rest of your application is built by adding child widgets (more on
this later in the series).
class TutorialApp(App):
    def build(self):
        return Button()
Actually we can go a little further than this and set some properties of the button. As far as we’re concerned right now, these are just attributes of the button controlling its appearance. You can see the full list of appearance properties in Kivy’s documentation, but for now lets just set a couple of simple ones:
class TutorialApp(App):
    def build(self):
        return Button(text='Hello!',
                      background_color=(0, 0, 1, 1),  # List of
                                                      # rgba components
                      font_size=150)
If you run the application now you should get something much more interesting - a nice blue button sized to fill the window, which you can click (that’ll make the button lighter), and which you can run and dance and play with or whatever.

At this point you already have an app worth playing with. You can change the values of the properties we defined (text, background_color, font_size) and see how it affects the button, as well as looking up other options in the documentation, or even replacing it with other simple widgets - the Kivy website has a full list.
Some more complex behaviour
I’m going to finish this tutorial entry by just quickly introducing a couple more widgets in a way that adds some significantly more interesting behaviour and interaction to the app.
To do this I’ll use a Scatter widget. This can be moved, resized and
rotated by interactions (either mouse or touch) or manually in the
code, and in the process takes care of propagating these changes to
any child widgets so that you can easily apply these transformations
to any Kivy widget.
We don’t need the button any more, so you can replace that import with
from kivy.uix.scatter import Scatter
We’ll also need a couple of other widgets. First, a Label which
displays some text and will be placed in the scatter (so it will be
possible to move, rotate, scale it etc.), and second a FloatLayout
that will be our new root widget. A layout is a special kind of widget
that manages the size and/or position of its child widgets. The
FloatLayout in particular lets widgets behave basically like windows
on your desktop probably do - they can have arbitrary positions and
sizes. That’s what we want, since we’re using a scatter whose position
and size may be changed by our interaction, and we don’t want some
other layout interfering with that (see future tutorial entries for
more). The FloatLayout also has other features like letting us
easily size widgets proportionally, but that’s not important here.
from kivy.uix.label import Label
from kivy.uix.floatlayout import FloatLayout
Now, instead of making a button we’ll need to instantiate our new widgets.
class TutorialApp(App):
    def build(self):
        f = FloatLayout()
        s = Scatter()
        l = Label(text='Hello!',
                  font_size=150)
Note here that the floatlayout and scatter don’t have any special properties set, but we could do stuff like disable the scatter’s touch interaction at this point if we wanted to.
At this point we have three widgets - different to before where we only had a single button! We can only return one of these widgets to be the application’s root widget, so the others will have to be child widgets added to one of the other ones. We do this by adding each widget to a different widget above it.
class TutorialApp(App):
    def build(self):
        f = FloatLayout()
        s = Scatter()
        l = Label(text='Hello!',
                  font_size=150)

        f.add_widget(s)
        s.add_widget(l)
        return f
Now everything is added below the floatlayout, which is returned to become the application’s root widget - it will fill the screen (though it has no visual representation so we won’t be able to see it), but we will be able to see the label that we should be able to move around by interacting with the scatter that contains it.
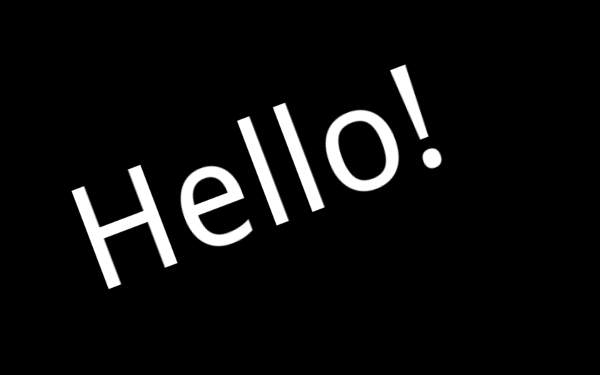
Lets try it! If you run the application you should see something like the following:
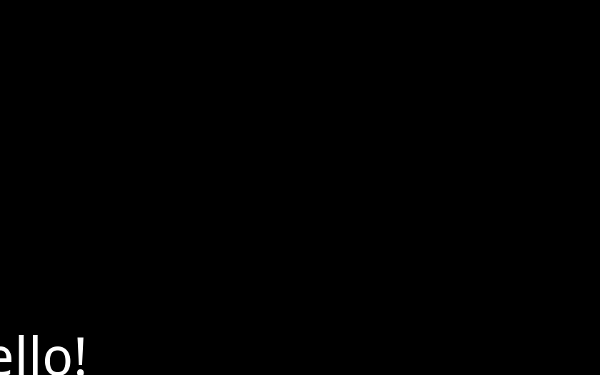
The text doesn’t all fit in the screen because the initial position of
the label is in the bottom left corner, and the text doesn’t entirely
fit within the Label widget (a full explanation will come in a later
post). It doesn’t matter though, because you should be able to drag
the text to the centre of the screen! This is all automatically
handled by the scatter widget containing the label.
On the desktop you can also right click to interact with multitouch emulation. Each right click creates a red dot representing an emulated touch. By creating and dragging multiple touches on the label you can recreate the inbuilt gestures of rotation and pinching to zoom. If you use a scatter widget on a touch device, you can of course do the same thing with normal touch interaction.
That’s it for this first entry in the Kivy crash course, going straight from an empty file to a fully working kivy app that already supports dynamic touch interaction. The next entry will cover how to compile this app (no changes whatsoever!) straight into an android apk that you can run on most android devices.
You can download the finished code from the crash course github repository.